Home

Thursday, November 3, 2016

MIO Compadres Autumn Breeze Hop


I am in my studio with the door open on this beautiful fall day! I hope everyone is experiencing lovely weather. I love this time of the year! The MIO Compadres have gotten together for this hop to share some Autumn creations with you.

Laura was the first stop on the hop and I'm sure you enjoyed what she had in store for you! If you missed her hop stop please click the previous button and it will take you directly to her blog. There is a list located at the bottom of this post with a list of hop stops in case you missed any.


GIVEAWAY

We are having a giveaway this month!
To enter simply comment on each stop by the 17th at midnight EST and you can be eligible to win the above prize.
That's right, every person that comments on every stop on the hop will be entered to win, so don't miss any! Winner to be announced on Laura's blog on the 21st.

CONGRATULATIONS CHAR K OUR WINNER FOR THE COOKY SPOOKY HOP!!!


With all the rage being on interactive cards lately, I couldn't resist having this adorable hedgehog from MFT's  Happy Hedgehogs jump out of a pile of leaves. I started by stamping all my images with MFT Black Licorice Hybrid Ink on 110lbs Neenah Solar White cardstock and colored them with Copics. I used my Scan N Cut to cut them out. I blended Tim Holtz Tumbled Glass, Bundled Sage and Mowed Lawn Distress Inks On a 4" x 5 1/4" piece of 110lbs Neenah Solar white cardstock with an ink blender to create my background. I laid my pieces out to see where my slider needed to go and then die cut it out using MFT's Surf And Turf Die-namics. I also put Elizabeth Crafts 4" Double Sided Adhesive on both sides a piece of Fun Foam, put a piece of white cardstock on top and cut the channel slide out using MFT's Slider Channel Builder Die-namic. 
I had set my mind to the fact that I wanted the leaves to fly into the air when the hedgehog jumped up. This was something I had to work at to get the results I wanted. In the end, I put my leaves on little strips of acetate and cut 2 more pieces in an arc to attach them to, so they were scattered. After attaching them to one piece with score tape I put more score tape on top of them and put the other arc on top. This was mounted to the slide mechanism behind the hedgehog. I used more than one pile of leaves to have enough room to hide my hedgehog and used SU dimensionals on the outside edges to pop the leaf piles up to allow the hedgehog to slide behind them. I stamped my sentiment with MFT Black Licorice Hybrid Ink using my MISTI. I assembled my card and mounted it on a piece of Lawn Fawn Perfectly Plaid Fall paper cut 4 1/4" x 5 1/2". I thought my pull tab looked plain so I glued the mushrooms to the top.


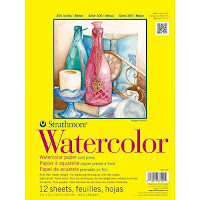
Recently MFT came out with a stamp called Jumping For Joy which seemed like the perfect match for last years Thankful Friend. This made me want to revisit that card and create one with the new set in the same fashion. I absolutely love these Pure Innocence fall stamps. I started with a piece of watercolor cardstock and applied Fineline Masquepen. Then I sprayed Dylusions ink and Mica Sprays ( the same ones in the givaway). I let this dry really well before removing the masking. I used my EK Success Powder Tool on the background then heat embossed my Sentiment with Ranger White EP. I used Copics to draw a tree on the left and then cut one from MFT Hot Fudge cardstock using Lawn Fawn's Leafy Tree Portrait die. I also cut some extensions to the branches by hand. I used MFT's Black Licorice Hybrid Ink to stamp my images and colored them with copics. When they were done I cut them out on the Scan N Cut. I assembled my card and mounted the card front on a piece 
of MFT Boysenberry card stock that was die cut with Die-namics Blueprint 25. Let's not forget the Glossy Accents on the leaves.


I hope you enjoyed hopping with us! I know we enjoyed sharing our creations with you all and hope you will join us again. Next on the hop is Jasmine! Please click the next button and it will take you to her blog.


1. Laura
2. Deana- You are here!!
4. Linda Gorman
5. Lisa 


Thursday, October 6, 2016

MIO Compadres Halloween Cooky Spooky Hop


I'm super excited to get back to hopping with my Compadres! We will be sharing some awesome card creations and possibly some other projects here and there  on the first Thursday 9am EST over next several months. This is a great time of the year to start creating cards for the up coming holidays. 

Before I get to how I created my cards I want to let you know we have a giveaway which is posted below and all you have to do to enter  is leave some love at each stop on the hop through 10/20.  A winner will be announced on Laura's blog 10/24.


If you are coming from Laura's blog which is the first stop I hope you enjoyed her creations as much as she enjoyed making them. If you missed her stop be sure to click he previous button and it will take you there. The list of stops is located at the bottom of this post in case you get lost. Don't forget to show those girls some love!


 Now on with my cards! I started this one by die cutting the Lawn Fawn Leafy Tree Landscape out of black card stock twice and set them aside while I created my background. For my background I used my 2 1/2" circle punch and punched a circle out of masking paper ( you will use both the positive and negative). I laid my 2 tree die cuts in opposite directions but lining up the frames and placed them on my 4 1/4" by 5 1/2" Neenah solar white 110lb card stock. This helped me place my negative from my masking paper for my moon. After I had it where I wanted it I blended Squeezed Lemonade Distress Ink in the circle. To give the moon texture I used Amused Studios Harvest Moon stamp and MFT Cement Gray Ink along with my MISTI, lined it up and stamped. I then place the positive circle mask over the moon to protect it while I blended the Distress Ink colors Salty Ocean, Seedless Preserves and Chipped Sapphire to create a night sky.


 The Amuse Studio Harvest Moon set has an awesome owl and branch which I lined up to look like part of the tree and stamped using Brutus Monroe Detal Ink and my MISTI. I sat here pondering how I could get those erry translusent clouds. I didn't want them opaque so I decided to try some Wendy Vecchi Mica Spray in Pearl. First I tried it direct and it was ok , but then I sprayed some on my craft
mat and used a brush and that was perfect.


I stamped the dogs and their costumes from Lawn Fawns Happy Howloween and color them with copics, then cut them out on my Scan N Cut. I assembled my card, then brushed the top and bottom of my frame with my powder tool, stamped the sentiment with Versa Mark and embossed it with Ranger detail white.


For my last card I cut the Lawn Fawn Hillside Pop-up and the Lawn Fawn Stitched Tree Border from black card stock. I glued the tree border to the hills and attached it at the bottom only to a white card base and set it aside. Next I used Hero Arts Spider Web Stencil, a piece of Neenah Solar white 110lb. I taped the stencil down, laid a mask down that I had already punched a 2 1/2" circle out of. I saved the circle to use later. The moon was blended with Squeezed Lemon Distress Ink. I put the circle I saved over the moon and blended the rest of the sky with Seedless Preserves, Wilted Violet, Salty Ocean and Chipped Sapphire. I stamped the bats and house (I placed this piece in place on the card base so I could line up my house with the hill) with Brutus Monroe Detail Ink. To make the house standout more I stamped the house again with Versa Mark and embossed it with WOW clear embossing powder. The windows are embossed with a lite dusting of Yellow EP. The tombstones are also from Newtons Nook Spooky Street and heat embossed with WOW Silver Pearl EP. My sentiment and large bat is from Sugar Pea Designs Fangtastic. I heat embossed the sentiment with Ranger Detail White EP . I colored the bat with copics and cut it out on my Scan N Cut. It's attached to the background with a mini wobbler. To wrap up the inside of the  card I cut a piece of card stock from Lawn Fawn Let's Polka In The Dark to fit the bottom of my card base. Then I used score tape to attach the two tabs of the pop up.


 The outside I kept simple. I used a piece of card stock from the same Lawn Fawn card stock pack and laid the web stencil in the corner and blended MFT Cement Gray Ink over it. I stamped the spider from Spooky Street with Brutus Monroe Detail Ink. Last but not least I used Jolee's Boutique stamps.


1. Laura 
2. Deana Benson - You Are Here


Wednesday, June 1, 2016

3rd Annual Blogs 4 Boobies Card Auction


Welcome to the 3rd Annual "Blogs 4 boobies" blog bounce(hop)!
This is day 1 of a 7 day event! Be sure to come back the next seven days for more cards/projects and fun!
We are so glad that you joined us today. This is a one-of-a-kind-blog (hop)bounce! Every card/project that is show here in the "blogs 4 boobies" blog bounce is up for auction! All of the money raised through the silent auction, on our blogs, will be donated to the Susan G. Komen foundation. Skipping Stones Design is also donating $2 to the cause for EVERY stamp set sold during June 1st-14th. SSD is celebrating "Blogs 4 Boobies" with the release of 6 ALL NEW Stamp sets.

There are 3 ways that you can help, and join in on the fun(draising)!

1. You can help by Shopping!
For every stamp set that you purchase during June 1st through the 14th SSD will donate $2 to the Komen Foundation. Stamping and shopping that you can feel good about ! Skipping Stones Design is celebrating "blogs 4 boobies" with the release of six new stamp sets!!! Click here to check out SSD stamps
Here is your first look at Best Of The Birds 4"X6" Stamp Set
2. . You can help by *Biding!
Another way you can help us raise money for the Komen Foundation is to *bid on a project or card along the blog bounce(hop). YES! EVERY Single card/project along the blogs for boobies bounce is up for auction. We recommend a starting bid of $5 or more. Your *Bid not only includes the card or project but shipping to your home as well. Please Note IF you want to bid, and live outside the U.S. we would request that you pay the difference of shipping charges between where you live and what it would cost to ship within the US. * See how to place a bid for more detailed instructions.
If you are the highest bidder 7 days after the first post date 8:00 p.m. mountain time then you WIN the card/project that you bid on.
3. You can help by Telling Your Friends~
Help us spread the word about "blogs 4 boobies" the more people that know, the more money we can raise!!!
I was so honored to be asked to participate in such a worthy cause!
The people at Skipping Stones Designs are awesome and so giving!
Let's bid these cards up and help the woman who have been struck with this awful disease! 
Here is my set of cards up for bid!


*"How to place a bid on my card/project"
Step #1
Find the comment section of the blog that shows the "Blogs 4 boobies" card or project that you want to buy. *Please note you may only bid on the card/project shown in the specific "blogs 4 boobies" post. *Any bids not placed on the correct post will be considered invalid.
Step #2
Once you are in the "blogs 4 boobies" comment section fill in the dollar and cents amount of what you are willing to pay for the card/project. We recommend a starting bid of $5 or more. Remember your bid includes shippingas well as the card/or project. 100% of the money your bid will go to the Susan G. Komen Foundation
Step #3
Next to your $ bid please type in your email address. During a silent auction bidders sign their name next to their bid. typing your email address is the electronic equivalent of signing your bid. Also it will help the blogger contact you if you are the highest bidder.
Step #4
Watch and wait.
Once you have entered your bid/comment sit back and wait. If someone out bids you then you may bid again. Bidding will continue until 8:00 p.m. Mountain time 7 days after the first post.
* Please note that the participating stampers/bloggers will probably re-post their Blogs 4 Boobies card/project on the during the week of bidding in June. When the blogger re-post their project then the bidding will continue on the NEWEST post and that comment section.
"What do I do once I place a bid"
Watch and Wait
The "Winner of the Auction" Will be the highest bid (that includes an email address)in the comment section of the MOST RECENT blogs 4 boobies post at the end of the silent auction. Please note that ALL cards/projects WILL BE REPOSTED seven days after their initial post. The auction will end at 8:00 p.m. Mountain Time seven days after the first post .
Things to keep in mind:
Near the end of the bidding you may not see bids as they come in. Most blog have a comment feature where the blogger must approve comments before they are published. So bid high. You might have the highest bid
The "Winner of the Auction" Will be the highest bid (that includes an email address)in the comment section of the MOST RECENT blogs 4 boobies post at the end of the silent auction. Please note that ALL cards/projects WILL BE REPOSTED seven days after the first post. The silent auction will end at 8:00 p.m. Mountain Time on the seventh day following the initial post .
Things to keep in mind:
Near the end of the bidding you may not see bids as they come in. Most blog have a comment feature where the blogger must approve comments before they are published. So bid high. You might have the highest bid that is published, but someone might have outbid you in an unpublished comment/bid.
The blogger/designer will declare who has won the silent auction. Skipping Stones Design will send you an invoice for your donation/bid ammount. Please pay that invoice as soon as possible, so the designer can get your card/project in the mail to you.

Here is the amazing lineup of designers for day 1:
Just click on the names and it will take you there!
Skipping Stones Design-
Connie Mercer
Ilina Crouse
Kelly Gettelfinger
Amy Sheffer
Deana Benson You Are Here!!!!
Megan Hoeppner
Giovana Smith
Stephen Kropf
Jacquie Marie

Thursday, May 19, 2016

Stampin Friends May Blog Hop


Welcome to Stampin Friends May Blog Hop!
This month we are sharing Get Well, Sympathy and Thinking Of You cards and projects.


We have a line up of super talented designers and I'm sure you will be wowed!
If you just arrived from Siara's Blog thank you for continuing with the hop!
If you missed her blog click the Previous button to check out her amazing creations.


              We are excited to have three Awesome Guest Hoppers this month
                that you should definitely check out!

  1. Ready to win lots of prizes?!! Just enter the giveaway by commenting #SFMayHop! If you
    comment and include #SFMayHop on each blog it will give you a chance to win a crafty gift mailed
     to you from each blogger. Details below!


For my first card I decided to make a sympathy card. I started with a piece of water color paper and spritzed it with water. Then I used an auqua brush and MFT Dye inks Cotton Candy, Summer Splash and Grape Jelly to water color the panel. I had laid Stampin' Up's Striped Scallop die on top to hold it flat while I dried it with my heat tool and noticed it left some faint markings. So I spritzed the die with water and placed it back down. Then I decided to spray Wendy Vecchi Pearl mica spray on it and let it dry. Once dry I die cut it with MFT's scalloped rectangle from Blueprint 20. I inked up a sentiment from MSE Sadness Flies with Brutus Monroe Raven detail ink and stamped the lower right corner. I die cut two Stampin' Up Butterflies one from MFT Brushed Silver and One from MFT Summer Slash. I layered them off set a little. I finished my card up by mounting it on a piece of MFT Gravel Gray card stock, added some Design Creative Bling sequins and Ranger stickles.


For my project I created these cute bags to put some pick me up thinking of you doodads in.
These are created with the WRMK Gift Box Punch Board. You start with a piece of 12x12 card stock and the punch board ( I turn my punch board so the words are upside down and the knob is closest to me to make it easier to punch). Line the paper up with the large mark on the right, punch and score the two marks that come from the punch.
 Then slide the paper right and line up with the XL mark on the right and score the XL diagonal score mark on the left.Repeat this for each side


.


 Flip the paper over and line up with the Large mark on the right and punch. Repeat for each side. . 


 Fold all your score marks


Glue the flaps at opposite ends down. this will be the sides. 

Fold the other two flaps over at the halfway point and glue. ( picture below)
Then fold the sides in on these same ends and glue forming a box.


Bring the two sides with the half flap together and punch a hole in the center that goes through both flaps to insert brad for closure.


cut two strips of card stock 1/2' by 12' for handles. Glue the handles next to the front folds. You can add brads for strength and decoration. You can now put what ever decorations you would like on your bag. Enjoy!


  1. I'm so glad you stopped by and hope you enjoyed my creations. I'd love to hear from you in the comments section and feel free to follow me and checkout my other post. Up next is Lynn just click the Next button to continue on the hop and see what awesome creations she has in store for you! This is not goodbye but see ya later!


  2. Deana Benson -- YOU ARE HERE!! 
If you go to shop.lauralscott.com you will find an awesome 35% off sale plus spend $75 and get 10 off coupon. They have the WRMK 123 punch board that you can make these bags and more with.