Home

Sunday, January 22, 2017

Mama Elephant Love Quotes & Zenith Borders Valentine Card

Well It's been a while since I have been on my blog. I have been creating cards but somehow with life's usual bumps in the road they haven't made it to my blog. One of these days I will record them...I hope since I'm not much on writing. What better holiday to get back in the groove than Valentines Day.


I was gathering my Valentine themed stamps together today and putting them in a quarter bin that I use to hold the current holiday or season's stamp sets. I find I spend less time looking for stamps to use this way. While doing this several ideas popped in my head for projects with some of the stamps. This was one of them!

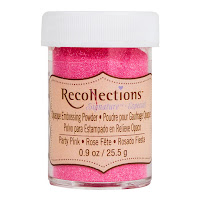
I started with a piece of Bristol card stock cut to 4 1/4 X 5 1/2. I had purchased it a while back and had never gotten around to using it and I must tell you I really like it a lot. I positioned the I Love You Circle from SSS Circle Sayings and the two penguins from Mama Elephant Love Quotes in the lower right corner and stamped them with My Favorite Things Black Licorice Hybrid Ink. I created a mask out of a piece of clear contact paper and placed it over the circle.I used one of Mama elephants Zenith Borders and stamped the front with versamark ink then started with Stampendous Red Tinsel EP at the top, then Recollections Party Pink and ended with Stampendous Blushing Pink Pastel for a variegated look. I very carefully removed the mask and heat set the EP.


 I colored my penguins with Zig Clean Color Real Brush Markers and stamped hearts above there heads in red and shades of pink. I stamped the speech bubble and sentiment from Mama Elephant on a scrap of Bristol using MFT Black Licorice Hybrid ink then water colored using light blue Zig Clean Color Real Brush Markers.


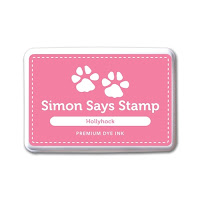
 My card base is a 4 1/4 X 11 piece of 110 lbs Neenah scored and folded in half. I used Waffle Flower's Pattern Play and stamped them using Stampin' Up Cool Caribbean and SSS Hollyhock ink to create a background. The card front was cut down using MFT Blueprint 13 stitched rectangle then mounted on the card base. I attached the word bubble to a piece of fun foam and fussy cut it out the mounted it to the card front. to finish up I stamped a heart on the word bubble in SU Real Red and added Judi-kins Diamond Glaze to the hearts.

I hope you this card and I'll be back soon with more! I f you have any questions feel free to ask. If you want to leave some love feel free to do that also, I really enjoy reading them. Below you will find pics of the products I used with the exception of the Stampin' Up inks which I believe my be retired and available on Ebay.


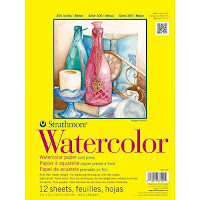
 SSS Hollyhock Dye InkStrathmore Bristol Smooth Paper
 Zig Clean Color Real Brush Pens Judi-kins Diamond Glaze Recollections Party Pink EP
 MFT Black Licorice Hybrid Ink versa mark SSS Cirle Sayings
 Stampendous Red Tinsel EP MFT Die-namics Blueprint 13
 Waffle Flower Pattern Play Mama Elephant Zenith Borders

Thursday, November 3, 2016

MIO Compadres Autumn Breeze Hop


I am in my studio with the door open on this beautiful fall day! I hope everyone is experiencing lovely weather. I love this time of the year! The MIO Compadres have gotten together for this hop to share some Autumn creations with you.

Laura was the first stop on the hop and I'm sure you enjoyed what she had in store for you! If you missed her hop stop please click the previous button and it will take you directly to her blog. There is a list located at the bottom of this post with a list of hop stops in case you missed any.


GIVEAWAY

We are having a giveaway this month!
To enter simply comment on each stop by the 17th at midnight EST and you can be eligible to win the above prize.
That's right, every person that comments on every stop on the hop will be entered to win, so don't miss any! Winner to be announced on Laura's blog on the 21st.

CONGRATULATIONS CHAR K OUR WINNER FOR THE COOKY SPOOKY HOP!!!


With all the rage being on interactive cards lately, I couldn't resist having this adorable hedgehog from MFT's  Happy Hedgehogs jump out of a pile of leaves. I started by stamping all my images with MFT Black Licorice Hybrid Ink on 110lbs Neenah Solar White cardstock and colored them with Copics. I used my Scan N Cut to cut them out. I blended Tim Holtz Tumbled Glass, Bundled Sage and Mowed Lawn Distress Inks On a 4" x 5 1/4" piece of 110lbs Neenah Solar white cardstock with an ink blender to create my background. I laid my pieces out to see where my slider needed to go and then die cut it out using MFT's Surf And Turf Die-namics. I also put Elizabeth Crafts 4" Double Sided Adhesive on both sides a piece of Fun Foam, put a piece of white cardstock on top and cut the channel slide out using MFT's Slider Channel Builder Die-namic. 
I had set my mind to the fact that I wanted the leaves to fly into the air when the hedgehog jumped up. This was something I had to work at to get the results I wanted. In the end, I put my leaves on little strips of acetate and cut 2 more pieces in an arc to attach them to, so they were scattered. After attaching them to one piece with score tape I put more score tape on top of them and put the other arc on top. This was mounted to the slide mechanism behind the hedgehog. I used more than one pile of leaves to have enough room to hide my hedgehog and used SU dimensionals on the outside edges to pop the leaf piles up to allow the hedgehog to slide behind them. I stamped my sentiment with MFT Black Licorice Hybrid Ink using my MISTI. I assembled my card and mounted it on a piece of Lawn Fawn Perfectly Plaid Fall paper cut 4 1/4" x 5 1/2". I thought my pull tab looked plain so I glued the mushrooms to the top.


Recently MFT came out with a stamp called Jumping For Joy which seemed like the perfect match for last years Thankful Friend. This made me want to revisit that card and create one with the new set in the same fashion. I absolutely love these Pure Innocence fall stamps. I started with a piece of watercolor cardstock and applied Fineline Masquepen. Then I sprayed Dylusions ink and Mica Sprays ( the same ones in the givaway). I let this dry really well before removing the masking. I used my EK Success Powder Tool on the background then heat embossed my Sentiment with Ranger White EP. I used Copics to draw a tree on the left and then cut one from MFT Hot Fudge cardstock using Lawn Fawn's Leafy Tree Portrait die. I also cut some extensions to the branches by hand. I used MFT's Black Licorice Hybrid Ink to stamp my images and colored them with copics. When they were done I cut them out on the Scan N Cut. I assembled my card and mounted the card front on a piece 
of MFT Boysenberry card stock that was die cut with Die-namics Blueprint 25. Let's not forget the Glossy Accents on the leaves.


I hope you enjoyed hopping with us! I know we enjoyed sharing our creations with you all and hope you will join us again. Next on the hop is Jasmine! Please click the next button and it will take you to her blog.


1. Laura
2. Deana- You are here!!
4. Linda Gorman
5. Lisa 


Thursday, October 6, 2016

MIO Compadres Halloween Cooky Spooky Hop


I'm super excited to get back to hopping with my Compadres! We will be sharing some awesome card creations and possibly some other projects here and there  on the first Thursday 9am EST over next several months. This is a great time of the year to start creating cards for the up coming holidays. 

Before I get to how I created my cards I want to let you know we have a giveaway which is posted below and all you have to do to enter  is leave some love at each stop on the hop through 10/20.  A winner will be announced on Laura's blog 10/24.


If you are coming from Laura's blog which is the first stop I hope you enjoyed her creations as much as she enjoyed making them. If you missed her stop be sure to click he previous button and it will take you there. The list of stops is located at the bottom of this post in case you get lost. Don't forget to show those girls some love!


 Now on with my cards! I started this one by die cutting the Lawn Fawn Leafy Tree Landscape out of black card stock twice and set them aside while I created my background. For my background I used my 2 1/2" circle punch and punched a circle out of masking paper ( you will use both the positive and negative). I laid my 2 tree die cuts in opposite directions but lining up the frames and placed them on my 4 1/4" by 5 1/2" Neenah solar white 110lb card stock. This helped me place my negative from my masking paper for my moon. After I had it where I wanted it I blended Squeezed Lemonade Distress Ink in the circle. To give the moon texture I used Amused Studios Harvest Moon stamp and MFT Cement Gray Ink along with my MISTI, lined it up and stamped. I then place the positive circle mask over the moon to protect it while I blended the Distress Ink colors Salty Ocean, Seedless Preserves and Chipped Sapphire to create a night sky.


 The Amuse Studio Harvest Moon set has an awesome owl and branch which I lined up to look like part of the tree and stamped using Brutus Monroe Detal Ink and my MISTI. I sat here pondering how I could get those erry translusent clouds. I didn't want them opaque so I decided to try some Wendy Vecchi Mica Spray in Pearl. First I tried it direct and it was ok , but then I sprayed some on my craft
mat and used a brush and that was perfect.


I stamped the dogs and their costumes from Lawn Fawns Happy Howloween and color them with copics, then cut them out on my Scan N Cut. I assembled my card, then brushed the top and bottom of my frame with my powder tool, stamped the sentiment with Versa Mark and embossed it with Ranger detail white.


For my last card I cut the Lawn Fawn Hillside Pop-up and the Lawn Fawn Stitched Tree Border from black card stock. I glued the tree border to the hills and attached it at the bottom only to a white card base and set it aside. Next I used Hero Arts Spider Web Stencil, a piece of Neenah Solar white 110lb. I taped the stencil down, laid a mask down that I had already punched a 2 1/2" circle out of. I saved the circle to use later. The moon was blended with Squeezed Lemon Distress Ink. I put the circle I saved over the moon and blended the rest of the sky with Seedless Preserves, Wilted Violet, Salty Ocean and Chipped Sapphire. I stamped the bats and house (I placed this piece in place on the card base so I could line up my house with the hill) with Brutus Monroe Detail Ink. To make the house standout more I stamped the house again with Versa Mark and embossed it with WOW clear embossing powder. The windows are embossed with a lite dusting of Yellow EP. The tombstones are also from Newtons Nook Spooky Street and heat embossed with WOW Silver Pearl EP. My sentiment and large bat is from Sugar Pea Designs Fangtastic. I heat embossed the sentiment with Ranger Detail White EP . I colored the bat with copics and cut it out on my Scan N Cut. It's attached to the background with a mini wobbler. To wrap up the inside of the  card I cut a piece of card stock from Lawn Fawn Let's Polka In The Dark to fit the bottom of my card base. Then I used score tape to attach the two tabs of the pop up.


 The outside I kept simple. I used a piece of card stock from the same Lawn Fawn card stock pack and laid the web stencil in the corner and blended MFT Cement Gray Ink over it. I stamped the spider from Spooky Street with Brutus Monroe Detail Ink. Last but not least I used Jolee's Boutique stamps.


1. Laura 
2. Deana Benson - You Are Here